
The main halyard is all wire, making that replacement relatively easy. Except the guy who sold us the stainless wire didn't give us oil-free stainless, so it made a huge mess all over the deck until the oil finally all came off. Suffice it to say we were not happy, especially when it came time to wash the decks and get all the gunk off!
The mizzen, mizzen staysail, and two headsail halyards are wire-double braid line, so some splicing would be in order. We could've purchased pre-fabricated wire-to-rope kits for the two mizzen halyards, but the headsails didn't fit the pre-fab mold and would have to be custom. Shopping around
It's amazing the reaction you get in the chandleries when you say you're going to splice the wire and rope yourself. Blank stares, hushed voices, wide-eyed recoils and disbelief while they wish you luck, tell you how hard it's going to be, how these splices are a nearly lost art... Almost enough to make you feel like a Jedi knight looking for Obi Wan! But I was non-pulsed; I've been braiding hair since I was a little girl, how hard could this be?
We did our normal internet searches, watched some YouTube videos, knew I would need a Swedish fid, and had the basic concept of splicing down, but I'll be the first to admit that my first attempt was a hot mess! Mistake #1 -- assuming the splice was anything like braiding. In fact, this was probably my downfall as I attempted to weave the line against the lay of the wire, like you would with a braid or most 3-strand splices. While presumably strong enough, it certainly wasn't a smooth taper, was difficult if not impossible to slide the cover back over the wire and core splice, and definitely did NOT neatly spiral around the wire like the professional splices we've seen.
Determined not to accept defeat, we purchased Brion Toss' book -- the Rigger's Apprentice. I dove in, but his descriptions seemed to be clear as mud and I was again frustrated. We grabbed some old 3 strand line off the dock and sat at the dining room table for hours with the book and line, practicing and trying to figure out how to get the elusive spiral down. I was even dreaming of splicing! Finally my epiphany came, I could visualize what Brion was talking about, and I was ready to attempt my next splice.
While not necessarily elusive, the splice takes some technique and some patience to complete. In addition to the Swedish fid, you'll need a table and vice, cable/wire cutters, a measuring tape, electrical and/or masking tape, scissors, a hot knife, an awl, bee’s wax, some good lighting and a few hours per splice (until you get the hang of it).


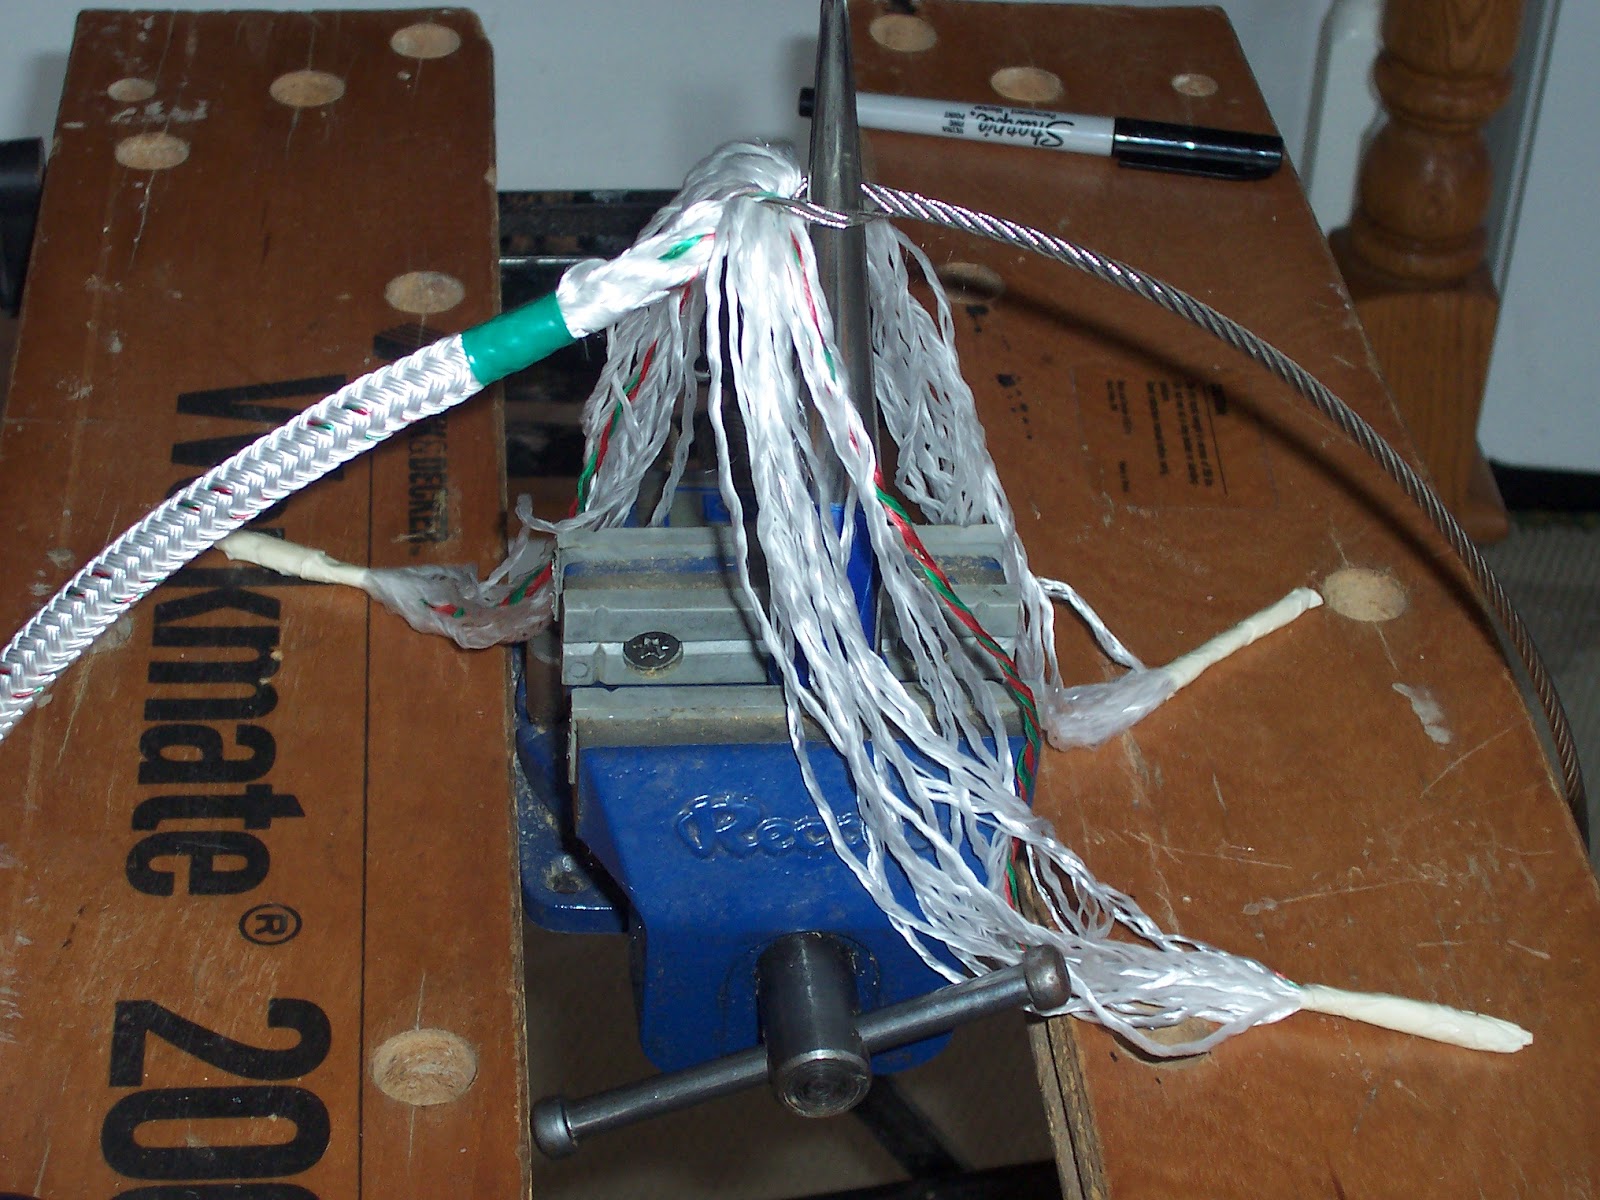
It did take a little practice, but here’s the finished splice. Supposedly this is one of the harder splices to learn and now I feel confident that we can do the splicing ourselves once we're out cruising.

One thing to keep in mind is that with the finished splice, the wire tip will be about 18" or so inside the line, depending on the length of your taper. There are several schools of thought as to where this wire splice should hit when you hoist your sail, and I have to say that we fully agree with Brion's recommendation. When your sail is up, the wire tip inside the line should be just shy of and never wrap around the winch. If it does, the stress of wrapping around a winch will force your wire to wear and chafe the line from the inside, thus shortening the life of your halyard.
Now that the wire-to-rope splices are done, we can focus on replacing the spinnaker and staysail halyards. Those will be all line and need eye splices, but that will be the subject of a different story!
Then comes the fun of installing them all.....
Not bad for the first one. Take a look at mine, see website, www.yatescustomrigging.com I have been making for almost 50 years. You need to pull test your work, should be 80% of the wire breaking strength or more.....
ReplyDeleteThanks for the compliment! My splices aren't nearly as impressive as yours, but they have improved since this one. Apparently practice makes perfect :-)
DeleteWe don't really have the equipment to pull test our splices on board, but they have handled full gale conditions with no problem.