Showing posts with label Down below. Show all posts

Monday, February 6, 2017

Doing Laundry Aboard Phoenix

Once we started spending more time aboard Phoenix we began grappling with the age-old question: what's the best way to do laundry aboard? Of course, there are plenty of options, but we wanted something that would be in line with the way we live on board.

We spend very little time -- if any -- at marinas, and prefer to anchor out. We may anchor near a marina, but typically only pull in to one to refuel or pump out the holding tanks, etc. We do have a generator on board; however, we prefer not to use it and would rather utilize the solar, wind and "green" energy for our daily living.

To fit our on board lifestyle, we needed a laundry solution that was simple, compact, that didn't draw a lot of power, and that didn't use up much water. We don't ask for much, do we? 😀

When we first began our refit, like everyone else, I was convinced that I wanted an electric washer/dryer. I loved the Splendide washer/dryer combo units that we saw on the new boats at the Boat Show, but the more we looked into them, the more disenchanted we became and found the units had several drawbacks:
  • The combo units weigh ~150 pounds, 
  • They can only dry about 1/2 - 3/4 of a washed load (the newest Splendide 2100XC can wash 15 lbs of clothes but only dry 11 lbs per load), 
  • They use between 7.5 and 16 gallons of water per load, 
  • Spin cycle is 1,200 rpm max,
  • Wash cycles are between 40-80 minutes, drying cycles are between 90-110 minutes, so you either have to be plugged in at the dock or the generator would be running for several hours at a time for a single load
Frankly, we prefer the smell of line dried clothes over using the electric dryer anyway, so we started exploring compact front load washers instead. Those also had their shortcomings and required just as much water and power for a wash cycle as the Splendide.

We then strongly considered portable washers like the Haier HLP21N. It weighs only 43 lbs, uses between 2-7 gallons of water per load, can be run off the inverter, and has wash cycles that run between 21-68 minutes. On the negative side, the spin cycle is only 700 rpm, so your clothes can be left relatively wet after a wash cycle.

On the opposite end of the spectrum, we tried hand washing everything and using a wringer to get both the dirty, soapy water and rinse water out of the laundry. This proved to be a royal pain in the butt since the wringers were labor intensive and it was difficult to get anything larger than a dish towel through them easily or effectively.

After looking at all of the options, we decided that washing clothes isn't really the tricky part, and there isn't anything particularly magical about the wash cycles of the various machines on the market. They all simply agitate the clothes -- either by stirring them around or pulsing soap and water through them. The real trick is getting the dirt, soap and water out of the clothes to get them truly clean (and to speed up drying time). The higher the rpm of the spin cycle, the cleaner your clothes will be since the centrifuge action removes the dirt, soap, and ultimately the water from your clothes.

With this in mind, we picked up a portable spin dryer that can spin at 3,200 rpm from Laundry Alternative. It is small (14" diameter, 24" tall -- roughly the size of a typical kitchen garbage can), weighs only 22 lbs, easily runs off the inverter, holds 13 pounds of wet clothes (same as a standard capacity top load washer), and can remove a TON of water from your clothes in 2-3 minutes. Unfortunately it doesn't look like they make our exact model anymore, but Panda makes a similar 3,200 rpm model with a slightly larger capacity that's available on Amazon.
Our 3,200 rmp spin dryer aboard Phoenix

Paired with my trusty 5 gallon bucket and a plunger that Bill modified by drilling holes through the base to force and suck water through the clothes, we have a relatively easy laundry system that meets our needs!
A typical load of laundry washed and ready to go into the spin dryer before rinsing
In the morning, we put our dirty clothes in the bucket with a small amount of laundry detergent, and used the plunger every now and then to agitate the clothes. The bucket easily fits in the corner of the cockpit, so we could agitate the clothes while underway if necessary. Later in the day, the wet, soapy clothes were loaded in the spinner and run for a minute or two to remove the dirt and water. Two rinses in the bucket (spinning between each rinse), and viola -- the clothes were clean, mostly dry and ready to hang on the line!

A typical load (1 bikini, 1 men's swim shorts, 3 shirts, 1 women's shorts, 3 dish towels) used 4.5 gallons of water. A load of towels (2 bath towels, 2 kitchen towels, 1 men's swim shorts, 2 hand towels) required a third rinse and used 6 gallons of water. After spinning at  3,200 rpm, the clothes dried in about 2 hours on the line, smelled wonderful and were nice and clean! Laundry day is no longer a chore and we don't have to listen to the generator and washing machine running for hours!

We may upgrade the plunger to a different handheld agitator like this one down the road, but our semi-low tech solution works wonderfully for now!

Manual clothes agitator

Sunday, June 5, 2016

Phoenix's New Cabin Sole Part 4: Finally Finished!

Once the tung oil finish on our teak and white oak cabin sole fully cured, we were finally able to reinstall the companionway ladder, the salon table, bring all of the cushions on board, and start to transition out of construction mode and back into sailing mode. But first, it was time to secure all of the hatch boards.

Phoenix's main cabin cleaned up and no longer in "construction mode"
As I mentioned in the installation, nearly all of Phoenix's hatch boards are removal. Those that we access infrequently (fuel/water/holding tanks, plumbing, etc.) were secured in place with #10 stainless steel screws.

To give us more convenient access to the six hatch boards we commonly use (battery box, water shut off valves, beverage storage, etc.), we borrowed an idea from the Amel 54 and installed concealed hinges.

Hinged hatch board on an Amel 54

Most European-type hinges are designed for cabinet doors that are a maximum 3/4" thick. Since our hatch boards are 1-1/8" thick (3/4" ply with 3/8" teak/white oak), we had to find special "thick door" hinges to do the trick. These hinges open 94 degrees and have a release latch to quickly remove the hatch if needed. The hinges required a 40mm bore in the door, so we had to order the appropriate sized boring bit as well. Bill padded out and reinforced areas in each hatch opening to accommodate the hinges with scrap teak, and after careful measuring, we had the six doors hinged and in spot.
Thick door European concealed hinge for our hatch boards. The base has a latch that allows us to separate the hinge and mounting plate, so the hatch board can be removed from spot if needed.

Hinged hatch board in the forward cabin. The nylon cleat was added to make moving the heavy hatch board easier, and it can be tied off to keep the door open when needed

Even though the hinges allow easy access, we still wanted the hatch boards to be secure when we go offshore. So the last piece of the puzzle was to install locking lift rings on each hatch.We purchased flush, locking stainless steel hatch lifts from Marine Part Depot, each of which required a 2" hole cut out. Bill screwed in a piece a Delrin for the swing arm to securely slide under to lock each hatch in place. When the lift is in the unlocked position, there is a red dot on the face, so its easy to do a quick visual inspection to make sure we've secured each hatch. Finally, we added a nylon cleat on the inside of each hatch that can be used to help raise and lower the board, or it can be tied off to secure the hatch in an open position if necessary.

Flush locking hatch lift in locked position

Flush locking hatch lift in unlocked position. The read dot allows for easy, visual inspection to see if the hatch is secured
Forward cabin hinged hatch boards

Aft cabin hinged hatch boards

Hinged hatch boards in the main cabin
Now that the cabin sole is finished, the hatch boards are installed, and Phoenix is out of construction mode, it's time to stop working and start sailing again -- for now...

Phoenix under sail on the Chesapeake Bay

Cheers!

Tuesday, May 31, 2016

Phoenix's New Cabin Sole Part 3: Sealed and Protected with Tung Oil

With our teak and white oak cabin sole installed, the next big hurdle was deciding on the type of finish we wanted to use on it. One thing that we knew for sure was that we didn't want anything that would be slippery or with a high gloss finish.

Teak and white oak cabin sole installed and ready to be finished

We've been on many production boats over the years, and slippery cabin soles are a definite no no. We're also not fans of high build finishes on teak -- we want our wood to actually look and feel like wood, not plastic. The aversion to high gloss is more of a personal preference -- we've used a satin finish throughout Phoenix, so a high gloss floor just wouldn't do.

Once upon a time there was an oil-modified urethane that boaters loved called Ultimate Sole; if they still made it, we probably would have used it. We looked into several gym floor finishes that are often used on basketball courts; however, the vast majority are now water based urethane finishes that aren't compatible with oily woods like teak unless you first wipe the wood with acetone, then seal it before finishing -- much more work and expense than we were looking for. Our friends Chuck and Susan recommended a product called Fabulon, which is a bowling alley finish that they were very happy with; however the non-slip bowling alley version is also only available in a high gloss.

There was also the consideration of touching up the wood down the road, and urethane finishes and varnishes aren't very easy to touch up without sanding and stripping. This led us to look at penetrating oils and waxes, and after pulling and reviewing the MSDS for several products we learned that they were simply either carnauba/parrafin cut with solvents or resins, or tung/linseed oil cut with solvents or resins.

In fact, products like Waterlox, "Danish Oil", or "Modified Tung Oil" are really just proprietary "spar varnishes" -- or mixtures of oils (~10% or less), resins (alkyd, phenolic, or urethanes) and solvents (mineral spirits, Naptha, or paint thinner (~60% or more of the formula)).  Most of these finishes are rather pricey, and given the chemical make up, we weren't very impressed. Pretty expensive paint thinner, if you ask us!

Ultimately, we opted to do a traditional tung oil finish (not to be confused with modified tung oils). Tung oil is a polymerizing oil but it needs solvents to penetrate into the wood rather than create a surface film. The main difference between a traditional tung oil finish and a modified finish or spar varnish is that you leave out the resins.

With the help of a solvent (mineral spirits), tung oil will penetrate and polymerize in the wood, giving it a flexible, waterproof finish. It cures to a matte finish, and won't peel or crack like urethanes. Unlike linseed oil, it will not attract mold or go rancid. Plus, touch up is easy -- periodically (maybe once a year for high traffic areas) wipe your tung oil/solvent mix on any worn areas with a lint-free rag.
 
Tung oil does not have UV inhibitory characteristics, so we wouldn't recommend using it on exterior wood unless you make your own spar varnish and blend it with a resin with UV inhibitors (pigments). However, for interior projects, it met all of our criteria (non-slip, not shiny, easy to apply, easy to care for and touch up, cost effective).

We purchased pure tung oil from Real Milk Paint and mineral spirits from our local hardware store. Real Milk Paint sells a citrus solvent that we would have used if we were living on the boat while finishing it (and we'll probably use this down the road for touch ups), but since we're not there yet, using mineral spirits was less expensive.

The owner of Real Milk Paint suggests a 1:1 ratio of tung oil to solvent for most woods, but a 1:2 ratio for dense woods like teak and white oak. We played with some test pieces before we got started, and decided that a 1:3 ratio of tung oil: mineral spirits gave us excellent penetration without darkening the wood too much.

Application was pretty easy. First, we used a random orbital sander to sand the entire floor with 120 grit paper, then vacuumed, wiped down with mineral spirits, followed by a tack cloth. We purchased a lambs wool applicator that we could attach to a mop handle, poured our tung oil/solvent mixture in a paint tray and mopped it on. The key was to get the maximum amount of tung oil to penetrate the wood in a short period of time -- basically keep the wood wet until it was saturated and would not absorb any more oil. (Safety Precautions: apply in a well ventilated area (exhaust fans in hatches), wear solvent rated masks (not dust masks), wear chemical goggles and nitrile gloves.)

The wood soaked up the first coat of tung oil pretty quickly, roughly 10-15 minutes after it was mopped on. The subsequent coats took longer to absorb, and I periodically mopped more oil on any areas that were absorbing the oil faster than others to get even coverage. Each cabin took 3-4 coats before the wood was saturated (oil remained on the surface and it looked wet/glossy for 45 minutes).

Two coats of tung oil on the foward cabin sole -- wet but not saturated yet

We wiped up the excess oil with old t-shirt material, and periodically went back over the wood with the cloths to mop up any oil that seeped out of the grain for the next 48 hours. We "skated" along the cabin sole with old t-shirts under each foot to make the job easier, and to gently buff the floor.

Excess tung oil wiped off of the forward cabin sole and ready to cure

Given Phoenix's size, we broke the job up into two days. On the first day we finished the head, aft cabin and forward cabin. The following day we tackled the main cabin.

The most difficult part of the process was having the patience to allow the finish to cure. Tung oil cures by oxidation and we needed plenty of ventilation to remove the solvent, so we had fans running to help speed the process. Initial cure is 10 days; with a full cure after 15-30 days, depending on the temperature.

Main cabin


Galley

Looking forward from the main cabin

Aft cabin

Hatch boards in the aft cabin


We wore Tyvek booties for a month and were careful to keep excess dirt/debris off of the floor. Once the tung oil had fully cured we were finally ready to get Phoenix out of construction mode and get her ready for the sailing season!


Saturday, May 28, 2016

Phoenix's New Cabin Sole Part 2: Installation

Our unfinished cabin sole never stopped us from enjoying Phoenix, and never got in the way of a good raft up with friends at anchor.

Rafted up with friends after the Governor's Cup Race in St. Mary's, Maryland

Enjoying afternoon cocktails with friends aboard Phoenix after the Governor's Cup, in St. Mary's Maryland
Yet, with the boat winterized and all of the teak and white oak milled and planed, it was time to install Phoenix's new cabin sole. Our friend Kurt came to visit and helped Bill get things started in the main cabin. After removing the salon table and putting Phoenix in "construction mode," it was time to go to work.

Nearly every floorboard on Phoenix is removable, allowing us to access the tanks, wiring, water lines, and of course, stowage. The access is great by all means, but adds a level of difficulty when installing a tongue and groove floor.

The first thing they did was replace a handful of the old 3/4" plywood floorboards. Some of the old boards were slightly warped, but more importantly they were irregularly shaped and would make removal of the new hatch boards and fitting in the new teak more difficult. So the first day's work was spent cutting new hatch boards, measuring, and running snap lines to make sure our teak and white oak stripes would be properly aligned.

They began working on one of the hatch boards in the middle of the main cabin, just aft of the main mast. Each teak board was glued and nailed in place with stainless brad nails. We opted not to nail the oak strips since they were so much lighter in color -- those were snapped into each teak board and glued in spot.

Installing the first teak and white oak tongue and groove boards

Bill was installing while Kurt cut the boards to length

First hatch board complete!

With good planning (and possibly a little luck) the first hatch board ended with a full board width. For many others, the teak or white oak strips had to be ripped so that it was partially on one hatch and partially on another, all the while being careful to align the stripes!

They continued working outboard in the main cabin, and were able to get the majority of the main cabin done while Kurt was visiting.

 
Bill making his way around the main cabin

Most of the main cabin done, except the intricate angle cuts!

Bill continued working throughout the winter when it wasn't too cold to be on the boat. The forward and aft cabins proved to be more difficult than the main cabin, since they had many severe angles along the cabinets and for some of the hatch boards. He carefully cut each board so that the grain would be continuous for the full run whenever possible, and painstakingly made sure that all of the stripes were aligned, even with the breaks in the hatch boards. Many intricate cuts later, we couldn't be happier with the results!

Main cabin done!

New cabin sole in the galley

Looking forward towards the main cabin

Looking aft from the forward cabin. The holes in the floor on the left are where the salon table is screwed into the sole (with backing plates on the other side)
After the installation, we put cardboard on the floor to protect it while we waited for the weather to warm up enough to seal and protect the wood. So close to finishing this project and getting back out there to enjoy the boat again!

s/v Phoenix and s/v Tortuga's Lie enjoying the sunset on St. Mary's River


Sunday, May 22, 2016

Phoenix's New Cabin Sole Part 1: Custom Milling

Phoenix isn't the first boat Bill's built. When he purchased our previous boat -- Meandrous -- nearly 20 years ago, it was essentially a bare hull that came equipped with lots of the parts, but nothing was assembled and there were no instructions.

Meandrous came with a trove of teak lumber, much of which was 3/8" thick, custom milled tongue and groove boards in 6-8' lengths. There was enough lumber for Meandrous' interior, and we've been using the leftovers to outfit Phoenix's interior as well.

One of the last major woodworking projects to complete on Phoenix was the cabin sole. We believe at one point in time she had a teak or mahogany sole, but by the time we got her, all of the floorboards had been replaced with marine plywood.

We'd been vacillating about how we wanted to finish the flooring, and one major concern was whether or not we had enough tongue and groove teak to complete the job. After measuring, counting boards and doing some calculations, we determined that we could probably do the head, forward and aft cabins but we didn't have enough for the the entire job. So it was time to get creative.

We thought about augmenting the teak with holly, but it's hard to find clear holly lumber in our area without a lot of knots. We looked at the thermal expansion characteristics of many species of wood, and toyed with using ash lumber. However, Maryland and the Midwest were recently hit with ash borer disease, making this lumber very difficult to come by. We found that we could get clear white oak from a local saw mill at an extremely reasonable price, so finally our decision was made. We bought several 5/4 6"x16' flat sawn white oak boards for the job.

White oak is more thermally stable when quarter sawn, and it exposes the really cool ray flecks in the wood, so the plan was to augment the teak boards with strips of quarter sawn white oak. We planed the 5/4 boards until they were ~7/8" thick, ran one edge through the joiner to give a true, straight edge, and then Bill used the table saw with a thin kerf blade to cut each 6" board into several ~1/2" thick strips. 

Raw 5/4 white oak boards ready for the planer


White oak planed and ready to but cut into quarter sawn strips
Bill checking each board for thickness before cutting into strips
White oak quarter sawn strips for our cabin sole
He then ran each strip through the planer until they were 3/8" thick. We had hoped to be able to use a router to cut the tongue and grooves; however, most tongue and groove router bits were designed for 3/4" boards rather than 3/8", and none matched the tongue and groove of our teak. Bill determined that our teak had a 1/8" tongue/groove, so he could use the table saw with a standard blade rather than a router. Each strip had one center pass to make the groove, and two passes on the opposite length for the tongue.

Finally, we ran the teak boards through the planer to clean up their faces, and the lumber was all prepped and ready for installing. We created a TON of sawdust in the process, but nothing in comparison to what we had in store for us with the installation!

Had to wear lots of protection to prevent getting sensitized with all of the wood dust!

Friday, February 26, 2016

Aft Cabin Redesign

Anyone who's lived on (or spent extended periods of time in) a boat, RV, or small apartment knows that storage space is extremely important. The original Andromeda/Christina layout for the aft cabin had ample storage, but modifications that were started by a previous owner dramatically changed Phoenix's aft cabin, with some changes for the better and some that needed improvement.

In the typical Andromeda/Christina master stateroom, the bed is to port, there are three hanging lockers (1 to starboard, 1aft and 1 to port), and a large set of drawers to starboard. The head is also on the port side, just forward of the aft cabin. Bruce Bingham designed three alternate ways to enter the head -- from the main cabin only (depicted below), from the aft cabin only, or dual entry from both the main and aft cabins. In Phoenix, access to the head is through the aft cabin only.
Original Andromeda interior layout. Notice the three hanging lockers and bed along the port side. In this version, the head access is through the main cabin. Aboard Phoenix, you access the head through the aft cabin.
One of Phoenix's previous owners built a pedestal bed in the master stateroom, so our bed is on center line, with a TON of under-the-bed storage. We really prefer the pedestal bed -- we both have better ventilation and no one is sleeping up against the hull or climbing over the other person to get in/out of bed. The only drawback is that we lost the aft hanging locker and the large set of drawers with the change.

Our port-side hanging locker was also converted to a large vanity. This moved the sink out of the head and into the aft cabin, which made room for us to design a spacious shower enclosure (in progress) instead of showering in the middle of head as originally designed. So we essentially gained a better bed and head layout that we love, but lost some cabinet space in exchange.

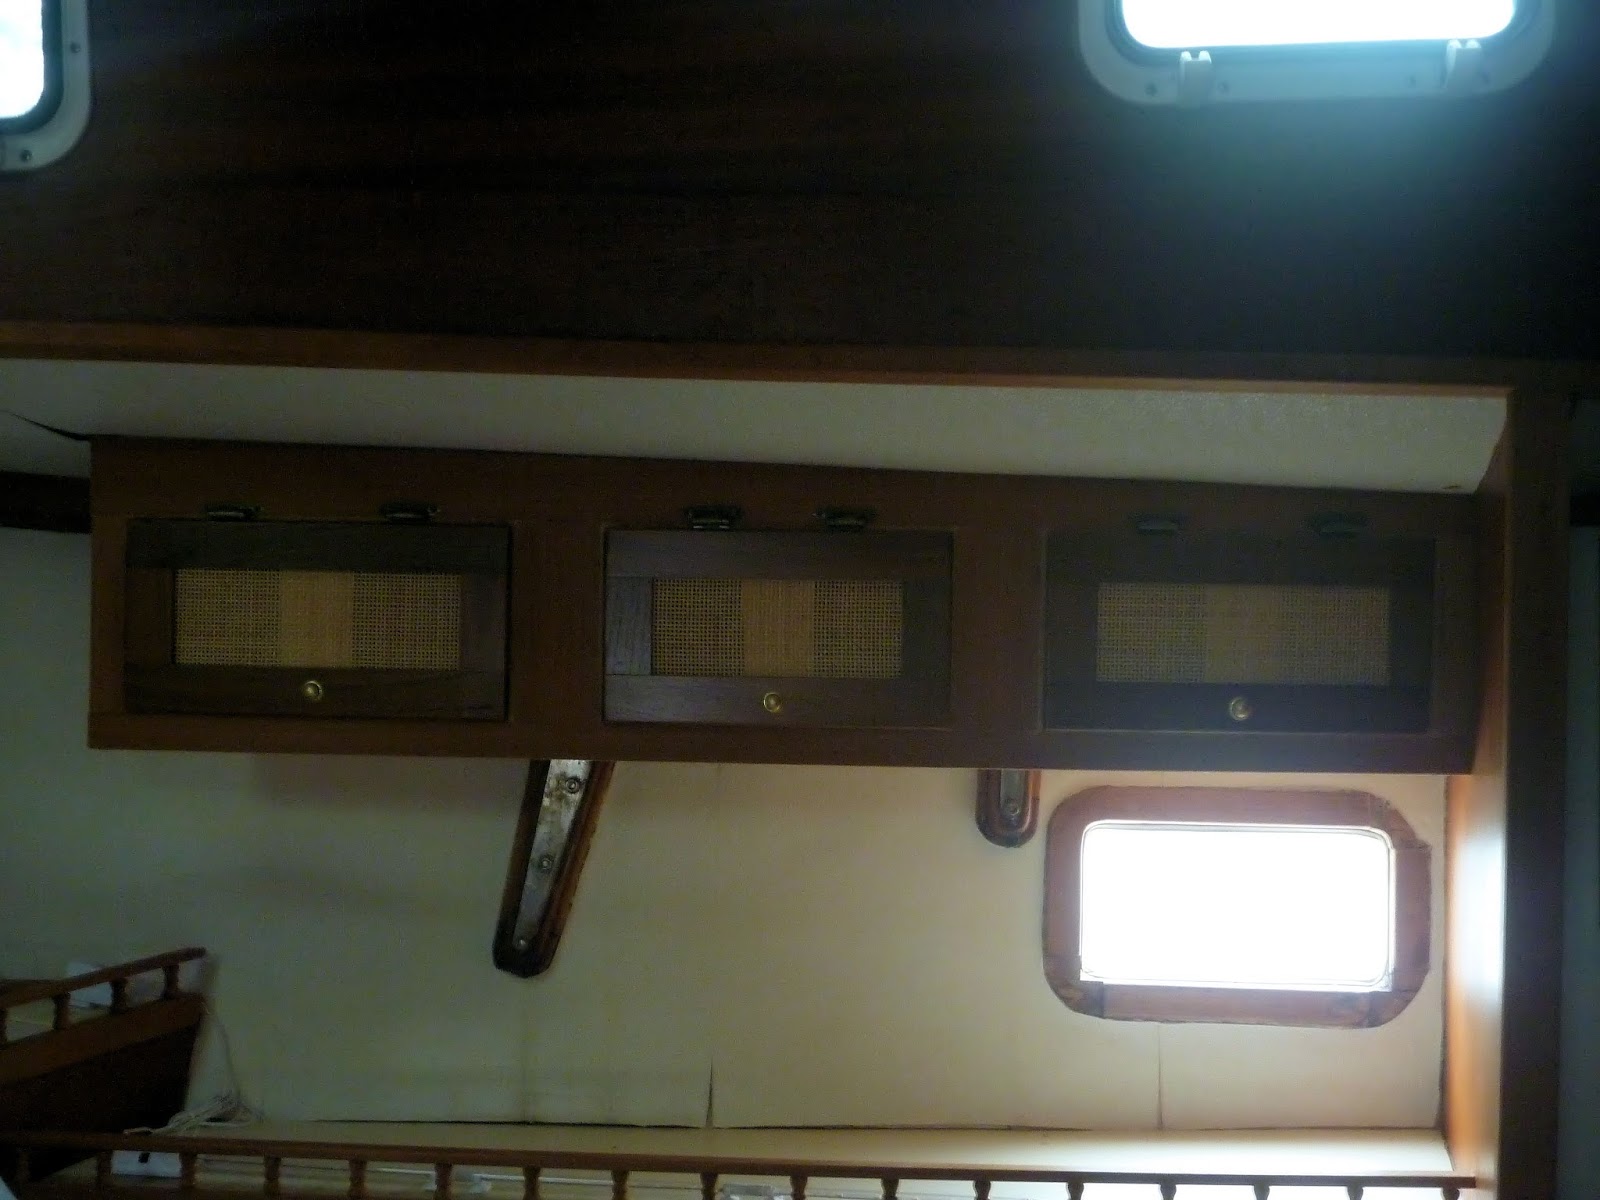
The initial aft cabin modifications gave the aft cabin a very open, airy feel; there were small lower cubbies, open shelves, and short upper cabinets along the hull on both port and starboard sides. We initially made teak and caning doors for the short upper cabinets when we made the first 26 cabinet doors and weren't planning to do any major changes to the design. The only plan was to add trim and a few finishing touches.

Aft cabin "before" with pedestal bed, but prior to our redesign

The small upper cabinets and shelving before our redesign

Lower, open cubbies and shelves before our redesign

However, as we spent more time aboard, our feelings towards the aft cabin layout began to change. We had plenty of open storage to accommodate our clothes and other "stuff" but the aft cabin looked messy with everything out in plain view. No matter how organized we were, the aft cabin looked cluttered. We decided we needed more (and larger) cabinets to properly stow our belongings and keep things neatly placed behind closed doors.

The first step was deconstructing our current cabinet facing and removing the teak fiddle rails. Once that was done our friend Kurt helped Bill rough in new cabinets along both sides of the hull.

Old cabinet facing and trim removed along the port side-- ready to start building new cabinets!

Port side cabinets roughed in.
Once the cabinets were built, I painted the insides, and we then faced the cabinets with teak ply.

Port side cabinets with teak facing
 
Starboard side cabinets faced, finished and ready for trim
Next, Bill custom milled and installed teak trim around the cabinets.

Teak trim installed around our new aft cabin cabinets


Next came teak trim for the ceiling panels, around the aft hatch, and mizzen mast, followed by teak and caning doors to match the others that we installed previously. We were able to salvage one of the smaller caning doors on each side that we previously made for the short upper cabinets.

New port side cabinets with doors installed

Starboard side cabinets and ceiling trim

I love all of the new, organized space we've created!
I can't wait for the warm weather to return so we can start utilizing our new space! Our new cabinets and aft cabin redesign provide a ton of room for us to properly stow clothes, eliminates the cluttered look we once had and gets us one HUGE step closer to becoming full time live aboards!