Happy 2018! It's been a while since we've taken the opportunity to update the blog. Although we haven't been writing as much, we have been busy working on and sailing
Phoenix as much as possible.
One of the biggest projects that we tackled during our blogging sabbatical was rebuilding the sea hood and windshield coamings.
When we originally installed our windshield and built hard top dodger/bimini, we made the sea hood and coamings out of marine ply skinned with fiberglass. Unfortunately over the years, there was some water intrusion where the aluminum windshield frame met the fiberglass, and we noticed some de-lamination beginning to occur.
Rather than let it fester, we decided to replace the coamings and sea hood with a more rot resistant material. As we began researching different materials to use, we had specific criteria in mind. We wanted:
- A thermally stable material that would not absorb water,
- Something that was compatible with fiberglass/epoxy,
- A paintable material
We didn't want to use plywood again, PVC was eliminated because of its thermal expansion characteristics, and Starboard (HDPE) wasn't an option because it can't be painted, not to mention its exorbitant cost.
We finally decided to go with HDU (high density urethane) board. Often used
to make exterior signs, HDU is a strong, naturally waterproof material that is much lighter than wood, thermally stable, paintable, and can be machined much like wood. It comes in a variety of thicknesses, and it works well with fiberglass and epoxy. Essentially, it was the perfect material for our application.
After we settled on the replacement material, it was time to surgically remove the old coamings and sea hood, which were sandwiched between the windshield and the main cabin top and fiberlassed in place. Bill used a Fein multi-tool with a bi-metal cutting blade to cut away the old coamings and sea hood.
 |
| Starboard windshield coaming cut away |
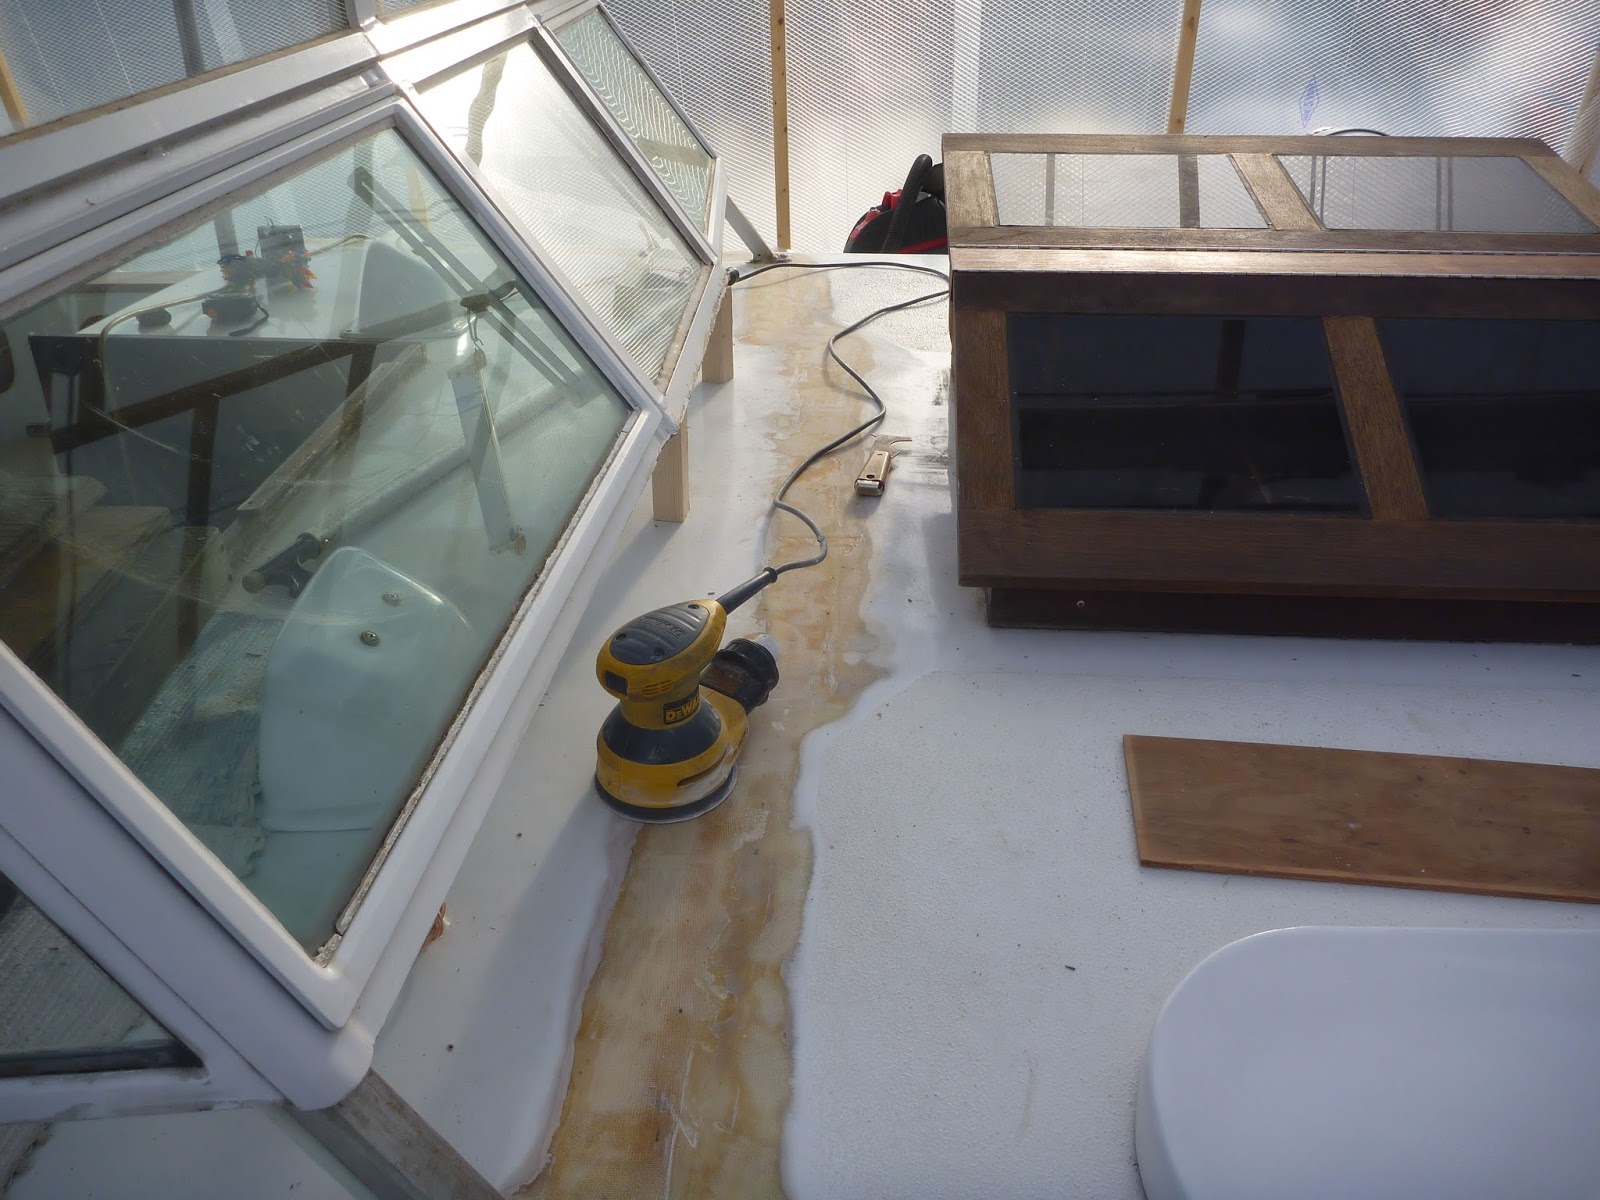
Once they were all removed, he used an orbital sander to get the area flush with the main cabin top. We used wood blocks to support the windshield while the coamings were removed.
 |
| Sanding the area where the windshield coaming and sea hood were removed |
Then it was time for the real fun to begin! We used the old sea hood as our pattern to make the new one out of HDU board. We had purchased 1/2" material for the coamings and wanted the sea hood to be beefier, so we laminated pieces together to make 1" stock for the sides.
We used Precision Board's HDU Adhesives to laminate the 1/2" pieces together, and to glue the top and sides of the sea hood together. They sell a fast-set and regular set version, both of which are water activated, one-part polyurethane adhesives. The fast-set fully cures in 30 minutes, while the regular cures in 12 hours. You definitely need to clamp and/or mechanically fasten the materials you're gluing together, but the final bond is waterproof and extremely tenacious. It will also bond HDU to wood, metal, fiberglass, etc. but beware -- a little goes a long way and if you use too much it will bubble and make a big mess!
We used the regular set adhesive to laminate the side pieces, and the fast-set to adhere the top and sides. Once everything was fully cured, we filleted the inside corners in the sea hood and epoxied 2 layers of 6.6 oz fiberglass both inside and outside of the hood. Knowing that the inside of the hood would be extremely difficult to fair once installed, we did as much fairing work out of spot as possible -- using 2-part epoxy thickened with micro-balloons.
 |
| Inside of our new sea hood made with HDU and fiberglass |
 |
| Side view of the HDU and fiberglass sea hood |
 |
| HDU and fiberglass sea hood sanded and ready for fairing compound |
We followed a similar process with the four pieces of the windshield coaming -- cutting and testing each for fit before fiberglassing both sides and fairing the hard-to-reach-once-installed areas with micro-balloons.
 |
| Test fit of the port side HDU and fiberglass windshield coaming |
Each coaming piece was then epoxied to the main cabin top. Once the epoxy set up, we filleted the seams, then fiberglassed the coamings in place with two layers of fiberglass tape (2" and 4" in areas with a tight radius (i.e., inside the cockpit), 4" and 6" where space allowed). Since we couldn't clamp the port/starboard coamings to the forward sections, we used lead bricks to hold the pieces in place while the epoxy set up.
 |
| Port side windshield coaming installed and filleted to main cabin top |
 |
| Expoxying a forward section of the windshield coaming to the cabin top |
 |
| Forward section of windshield coaming filleted and fiberglassed to main cabin top |
The sea hood was the last piece of the jigsaw puzzle to put install. Once it was epoxied, filleted, and fiberglassed to both the cabin top and its adjacent coaming pieces, it was time to sand and fair everything with micro-balloons.
 |
| HDU windshield coaming and sea hood installed and ready to fair |
 |
| View of the windshield coamings from the cockpit. Every seam and tight radius needed fairing and hand sanding! |
When we were satisfied with the fairing, it was time for primer. To make sure everything blended well, we prepped and primed the entire main cabin top (above the eyebrows and excluding non-skid areas), along with the aft portion of the main cabin in the cockpit.
 |
| Windshield coaming and main cabin top with primer |
 |
| All portions of the main cabin top and windshield coaming in the cockpit had to be primed and repainted |
We were finally ready for the gloss paint, which Bill sprayed.
 |
| New gloss paint on Phoenix's main cabin top |
 |
| Phoenix's new HDU windshield coaming freshly painted |
 |
| Phoenix's cockpit repainted and ready for reassembly |
By the time we were finished, the sea hood and windshield coamings looked as good as new! After the paint finished curing we added a bead of Dow 795 structural silicone between the new coamings and the aluminum windshield frame, and re-bedded all of the windshield glass while we were at it.
The new coamings and sea hood are pretty much identical to what we made the first time around, so most of our friends and neighbors didn't notice anything other than the shiny new paint. 😀
We definitely happy with the aesthetics, but more importantly, we're hopeful that the new material will provide many years of low-maintenance living!