Friday, January 25, 2019

Pypilot Open-Source Marine Autopilot for Hydraulic Steering

With our Raspberry Pi (RPi) navigational computer up and running, it was time to turn our attention to compiling and installing a new autopilot.

Phoenix has hydraulic steering, specifically an older Wagner system. It has a large volume ram (33 cu. in; ~ 540 cc), which we rebuilt and installed new seals a few years back. We had all of the components of a rebuilt Wood-Freeman autopilot that matched what was originally on Phoenix ready to install, but decided we wanted to go in a different direction.

The Wood-Freeman systems are certainly powerful (they're still used on many commercial fishing boats in the Pacific Northwest, shrimp boats in Texas, etc.), but they are clunky, take up a ton of space (think bowling ball-sized compass versus quarter-sized 9-axis IMU chip in modern systems), and are power hungry. Fine for a fishing boat that's motoring all the time, but not ideal for a sailboat watching electrical power consumption. To top things off, we learned that they no longer made the seals for the specific Wood-Freeman hydraulic pump that came with Phoenix, and our decision was made for us!

Our friend Sean D'Epagnier developed an autopilot system that he tested on several ocean crossings -- pypilot --  and we began talking to him about how to scale up his design to work with our hydraulic system.

Pypilot is an open-source, RPi-based marine autopilot for tiller- and wheel-driven boats up to 40 feet.  The software is included in OpenPlotter, and was designed to work specifically with OpenCPN. The system is modular, has extremely low power consumption, and can be built and customized by the end user. Alternatively, you can purchase a tested system directly from the pypilot store if you don't want to do it yourself.

Like most autopilots, pypilot consists of an autopilot computer (brain) and a motor controller.
  • The tinypilot computer is a WiFi enabled mini computer (RPi Zero) programmed with Sean's open-source pypilot software and with a 9-axis IMU chip or hat (3 axes of accelerometer data, 3 axes gyroscopic, and 3 axes magnetic (compass)). 
  •  The motor controller is an arduino-based unit that connects to the pilot and controls the tiller, wheel, etc. It has over-temperature, over-current (stall) detection, fuse and reverse polarity protection, voltage, current, temperature and optional rudder feedback, and optional port/starboard end of travel input switches (rudder sensor) to prevent the tiller or wheel from going hard over.

The tinypilot would be at the core of our design; however his current motor controller design can only work with rudder drive units drawing 2-3 amps and stall up to 15 amp. We knew our system would draw more juice than that, so we needed a more powerful motor controller for our system. Before Sean could develop the new motor controller, we had to pick a hydraulic autopilot pump and figure out what our power draw would be.

Our 33 cu. in. Wagner ram is on the larger end for recreational boats, and we were surprised to learn that we had only two hydraulic reversing autopilot pumps to choose from -- the Simrad RPU300 and the Accu-Steer (Kobelt) HRP35 (sold under the Accu-Steer brand or private labeled by Furuno). From what we've read, the Simrad pump is quite loud, and some people said it sounded like copulating cats! The pump was going to be under the floorboards in the aft cabin and I'm a light sleeper so that was a deal breaker! The Accu-Steer, on the other hand, was touted as being "whisper quiet" and over-sized for our ram, so it was the clear winner. [Note: we found that searching online for Furuno HRP-35 proved significantly cheaper than searching for Accu-Steer HRP-35 even though they are the same part. The site we ordered from listed it as a Furuno pump and it was drop-shipped directly from Kobelt USA.]

Once the hydraulic pump arrived, Bill made a custom aluminum bracket to mount it under the floor boards in the aft cabin. I was thrilled with the new location since the old Wood-Freeman pump took out an entire large cabinet in the aft vanity -- more storage space freed up!

The pump is through-bolted through the bracket using four neoprene compression mounts (pillow blocks) to help dampen any vibration and make the "whisper quiet" pump even quieter. We went to a local hydraulic store for custom length hydraulic hoses with Aeroquip fittings to plumb the pump into our Wagner steering system and self-bleeding expansion/reservoir tank that Bill previously designed and installed. It was a messy job cracking open the hydraulic fluid-filled copper tubing and removing the old, clunky Wood-Freeman pump that was also full. We had to take be very careful since we didn't want to get hydraulic oil on our beloved cabin sole or screw up our tung oil finish! Once everything was apart, we took the opportunity to install a few more ball valves to help isolate the pump for any future maintenance or repairs.

Accu-Steer HRP-35 reversing hydraulic autopilot pump connected to pypilot aboard Phoenix
According to the manufacturers, the 12v HRP-35 could draw 10 amps continuous and 30 amps when the cylinder hit its end stops (hard over). To make sure that the new motor controller could easily handle the load, Sean designed our controller to handle up to 60 amps (momentarily) and built the arduino-based digital controller in an aluminum box with plenty of heat sinks. It is similar to his original motor controller in that drives the hydraulic motor while also monitoring voltage and current; however it is significantly more powerful and can handle a greater power load. We also added a temperature sensor to the hydraulic pump so we can monitor both the pump and motor controller temperatures.

Pypilot motor controller for larger boats like Phoenix
Our hydraulic pump is wired to the pypilot motor controller, which is also wired directly to the batteries (see bus bar in picture above). The white waterproof connector goes to the pypilot computer. In our case, it is a RPi Zero W with a 8 GB microSD card loaded with Sean's pypilot software, along with an AltIMU-10 v4 9-axis IMU chip in a waterproof box with a 12v power supply. We added a 30 amp inline fuse as both a circuit breaker and power supply switch.

30 amp waterproof inline fuse

Pypilot Marine Autopilot on Phoenix. The white box at top houses the computer and IMU chip, which is wired to the motor controller. A 30 amp inline fuse controls the power. The motor controller drives the hydraulic autopilot pump plumbed into a Wagner hydraulic system

Pypilot uses electric currents to determine the rudder angle, so in many cases a rudder angle indicator is optional. This is fine for a tiller or possibly cable-driven steering, but with hydraulic steering we felt the rudder angle indicator was required -- both to set appropriate end stops to prevent the ram from going hard over (possibly damaging the seals) and to offer rudder feedback information. We purchased a 12/24v rudder angle indicator sensor, which is essentially a stainless steel arm attached to a potentiometer. We also needed a pair of 6-32 ball links to attach the indicator to the rudder post.

Rudder angle sensor

The rudder angle indicator attaches to the rudder post parallel to the ram. Since our ram is particularly long, Bill had to thread a long aluminum rod to go between the indicator and rudder post. The indicator is then wired from the indicator to the pypilot computer.


With all of the hardware in place, it was time to fire up the pypilot along with our navigational computer running OpenPlotter and OpenCPN. We'll call it the NavPi. As I mentioned in our previous post, we wanted to be able to see and control the autopilot and view all of our data at the nav station as well as in the cockpit using a Windows-based touchscreen tablet.

Pypilot functions as a WiFi access point (AP), and OpenPlotter can function as either an AP or as a client. In order to accomplish our goals, we have the pypilot set up as the AP and OpenPlotter set up as the client. When both are powered on, NavPi connects to the pypilot over the wireless connection. It receives rudder feedback information and controls the autopilot. The pypilot receives the wind, GPS, and other NMEA sentences transmitted from the NavPi. We can engage or disengage the autopilot, steer via compass, GPS, or wind (true or apparent) by clicking buttons in an OpenCPN plugin or app from the nav station.

When we boot up the tablet, it also connects to the pypilot over the wireless connection. Once we open OpenCPN on the tablet, it receives depth, speed, wind, GPS, AIS, rudder angle, pitch, heel, barometric pressure, temperatures, etc. from the two RPi computers down below and can also control the autopilot.

Once fired up, we had to calibrate the IMU and the rudder indicator. When the boat is level, go to the calibration page and set the pitch/heel angle by telling the software the boat is level.

Pypilot -- calibrating pitch and heel
The compass will calibrate while the boat is moving. For initial calibration, steer the boat in a 360 to allow it to collect enough data points for calibration (for us, we had enough points backing out of our slip, then turning to point into the wind to raise the main).

Pypilot compass calibration needs to be done

Pypilot compass calibration is complete and data points are located on the sphere

We also had to calibrate the rudder indicator and set the end stops. We centered the rudder and established 0 degrees, and also the end stops to prevent the rudder from going hard over. You can also establish fail safes to turn the autopilot off if the motor gets to a certain temperature, max current, etc.

Sample screenshot of pypilot plugin in OpenCPN -- from OpenPlotter Manual.

We went on a few test sails with Sean while he was visiting to test the system and work out any bugs. Sean made a video of one of our test sails.

Sean D'Epagnier remotely steering Phoenix using his pypilot marine autopilot
Since then, we spent a considerable amount of time sailing the Chesapeake and testing the autopilot on our own. The most impressive aspect that we can report to date is how efficient the autopilot is and how little power it consumes while steering true.

In our first trip out, we ran the pypilot for nearly 3 hours and used a miserly 1.2 amp hours! By comparison, most commercial autopilots will use 6+ amps per hour.

Pypilot uses remarkably little power when sailing upwind or on a beam reach, and we can run it for 10-12 hours in GPS mode and use 6 amp hours or less.

As expected, the power consumption varies with different sailing conditions, as well as with how well your sails are trimmed. We found we used the most power to date sailing on a deep broad reach (120-150 degrees), jib and jigger with a 4' following sea. Over an 8 hour run it used 9 amp hours. As soon as the waves subsided the power consumption decreased, and neither the motor controller nor the pump showed signs of overheating.

On a similar broad reach using the main and genoa, we used 6 amp hours over a 10 hour period.

Thus far, pypilot holds course very well in GPS and compass modes. Steering to wind is not the systems strong suit, though playing with the gains and sail trim does help somewhat. Sean is continually updating the software and is very responsive to questions people may have about his system. He is also continually updating information in his his online wiki "manual".

The biggest challenge in using the pypilot to date is getting used to the variety of gain settings to maximize efficiency, which we are still learning. There are almost too many parameters to play with! But the more we play with the pypilot the more we love having our new 3rd crew member on board!

Bill kicking back and letting the pypilot autopilot do all the work!

The pypilot was particularly helpful when we were trolling while sailing on a beam reach at 7 knots and had two fish on at once! The autopilot definitely did its part in filling the fridge (and our bellies) that day!

Catching Spanish Mackerel aboard Phoenix
If you are looking for a new autopilot, or to reduce the power consumption you use while running the autopilot, I would seriously consider looking into the pypilot. It does everything a commercial autopilot can do at a small fraction of the price and energy load.

Sean is very passionate about creating open source software that people can use and customize to their specifications. We had the opportunity to see Sean build, program, and make improvements to the pypilot system while he was working on ours and were impressed with the amount of time, attention to detail, and quality control he puts into each one. Although you could certainly build a pypilot from source yourself, purchasing a system built and tested by the creator at a low cost is a bargain and made a lot of sense to us. Plus, you get to help a fellow sailor continue to make cutting edge technology for all of us to use!



Sunday, January 20, 2019

Building a Marine Navigational Computer with OpenCPN and Raspberry Pi3

One of the many projects that we've been working on is upgrading and updating the electronics we have aboard Phoenix. There are, of course, many proprietary (expensive) choices available, and technology changes so quickly that as soon as you invest in one package, its quickly obsolete or unsupported. So we spent quite a bit of time exploring our various options and determining what we want.

We have Raymarine/Tacktick wireless depth, speed, and wind sensors already onboard, and a Standard Horizon GX2200 VHF/GPS/AIS receiver as well.  The goal here was to have a dedicated chart plotter and navigational computer that could incorporate data from our various instruments, work with the autopilot we were preparing to install, and provide the flexibility to incorporate data from a variety of devices/instruments without tying us to a single proprietary brand or system.

Phoenix's Nav computer running OpenCPN on a Raspberry Pi

We have been using OpenCPN on our laptops and a touchscreen tablet for quite some time, and have so far been very happy with its capabilities. For those who are unfamiliar, OpenCPN is free shareware that consists of a chart plotter and navigation software for use "underway or as a planning tool." OpenCPN was developed by a team of active sailors using real world conditions for program testing and refinement. You can download free charts for most of the world online, and/or import electronic charts that you have from Navionics, friends, etc. The software is open source, there's nothing proprietary, and the developers have done a great deal of work to make OpenCPN compatible with ("talk to") marine devices transmitting NMEA sentences. It is also compatible with most operating systems, and there are versions available for Windows, Android, Apple, and Linux.

Our original plan was to have a PC in the Nav station connected to a sine wave inverter running OpenCPN. However, when we sold Meandrous, the new owners introduced us to the Raspberry Pi (RPi).

These small, inexpensive single-board computers were designed to teach basic computer science skills in schools and developing countries, and have a myriad of applications both in and out of the marine environment. Raspian is the official operating system for the RPi, which is a version of Linux written specifically for these tiny computers. You choose the storage capacity for the operating system, though they generally recommend a minimum of an 8GB micro SD card for Rapsian, which is plenty to run OpenCPN as well. Roughly the size of a credit card (without the case) or a deck of cards (with the case), the RPi requires only 2.5 amps of 5.1V, so it can easily fit on even the smallest sailboat.

Once we read up on the capabilities of the RPi, we decided to change course and use a RPi to run OpenCPN and build a dedicated RPi Navigational Computer.

We started with a RPi 3B Starter Kit from Amazon, which came with a case, 32GB micro SD card, 2.5 amp AC power cable, HDMI cable, heat sinks, and a microSD USB reader. The micro SD card was preloaded with NOOBS (new out of box software) that contained Raspian and other operating systems to choose from. The 32GB storage was a bit of an overkill for our application, but it gave us more than enough storage to work with. 


Knowing we were going to have an onboard computer dedicated to navigation, we had already purchased a 21" LED monitor that's mounted in the nav station, but we still needed a few more items in order to integrate our existing electronics (depth, speed, wind, AIS) and have each component work with the RPi. Specifically, we needed:
  • 12 volt power supply socket
  • Keyboard (we opted for a flexible waterproof keyboard like this one)
  • Mouse (with the RPi 3B you can use a bluetooth mouse to free up a USB port if desired)
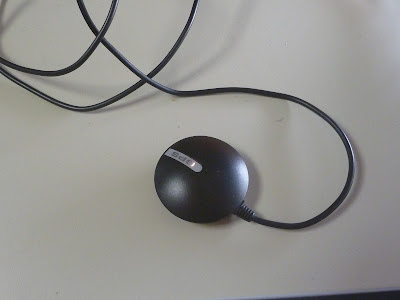
  • USB GPS Dongle (GlobalSat BU-353-S4 GPS Receiver)
  • USB RS232 Cables (we needed two -- one to connect the Raymarine info to the RPi, and one for the Standard Horizon AIS)
  • Multi-port USB Hub (the RPi has 4 USB ports. This allowed us to connect the mouse and keyboard, with extra ports for future additions).
For roughly $180, we had all of the components needed to build our navigational computer (excluding monitor).

Bill and I are by no means computer programmers and knew nothing about Linux or coding in general, so we had to do some homework to initially set up the RPi. Luckily there are plenty of online tutorials that make the process relatively simple.

Setting up Raspian from NOOBS is pretty straightforward, and really just plug and play, provided you have internet access to do the necessary upgrades. From there, we needed to add the OpenCPN software, which we opted to do from the source code, as a learning experience.

OpenCPN's website provides better instructions now than when we did our install, which you can find here. However, Anderson's Abroad and KingTide Sailing both provide excellent step by step instructions on setting up OpenCPN, setting up a wireless access point, installing the Kplex multiplexer needed to coordinate all of the data coming in from the various marine instruments, etc. We utilized both resources on the first go around. The installation did not go off without a hitch, and I had to learn a few Linux tricks in order to get things working. I initially had problems installing the Kplex multiplexer, and couldn't get our AIS and instruments to transmit simultaneously, but later found that it was a ground loop/wiring issue and not a software problem. We had another issue installing the OpenCPN plugins (essentially add on apps). After none of the published instructions worked as described, I had to install each plugin from source, and we reached out to Sean D'Epagnier -- one of the developers of OpenCPN and many of its plugins, for tech support.

Sean came to visit us, and we began chatting about an open-source autopilot program that he was developing. He just started collaborating with the programmers who develop OpenPlotter, and his autopilot software was already incorporated into its most current version. OpenPlotter is essentially the lazy man's way of building a navigational computer. :-) Instead of downloading and installing each component individually from the source code, the developers of OpenPlotter combined all of the software you need -- including OpenCPN, Kplex, Signal K (to share both NMEA 0183 and 2000 data), wifi access point, zyGrib (for downloading weather files), autopilot, and more -- into a plug and play operating system designed to work with the RPi. Like OpenCPN, it is free, open-source software.

Sean convinced us to re-write our SD card, start over with OpenPlotter, and test an autopilot controller that he would develop to work with our hydraulic steering system (more on that in a later post).

So we went to the OpenPlotter website and downloaded their NOOBS OpenPlotter v1.0.0 on our SD card. All of the software downloads and updates needed to be done in areas with internet access (and ideally fast internet, otherwise it will take forever), so the first part was done in the house. Then it was finally time to put everything together down on Phoenix.

Booting up the Rasberry Pi- based Navigational Computer aboard Phoenix.

The Raspberry Pi Navigational Computer on Phoenix with 12V power source, receiving depth, speed, wind, and AIS through NMEA 0183 sentences.

We mounted the RPi under our nav desk, and installed a 12v dual USB charger/socket waterproof outlet nearby for the RPi 5V power source. We added a rocker switch to we could turn the power to the socket on/off as needed. A standard USB-micro USB adapter cord powers the RPi from the socket.

The LED monitor connects to the RPi with a HDMI cable. The RPi 3B has 4 USB ports connected to the GPS dongle, the multi-USB port, AIS and Raymarine data, respectively. The mouse and keyboard are connected to the multi-USB port.
Our flexible, roll-up, waterproof keyboard at the Nav station

The wired end of one USB RS232 cable is connected to our Raymarine/Tacktick T122 Micronet interface that came with our instruments. The T122 sends NMEA data it receives from our depth, speed and wind instruments to the RPi through the USB end of the cable. Similarly, the second USB RS232 is wired to the Standard Horizon GX2200, which sends GPS and AIS data to the RPi. OpenPlotter takes all of this information and overlays it onto the OpenCPN chart plotter.

Standard Horizon GX2200 aboard Phoenix
GPS Dongle

Since we have two sources for GPS (the dongle and our Standard Horizon radio), I added a failover rule to the multiplexer in OpenPlotter (Anderson's Abroad discusses how to write the code). This established the GPS dongle as the primary GPS data source, and the AIS as the backup source. As long as GPS position data is coming in through the dongle, all of the GPS data from AIS will be ignored. If the GPS data from the dongle drops out, then KPlex will start accepting the GPS from Standard Horizon radio.

Querying an AIS target, showing GPS, wind, and barometric pressure data on the dashboard using OpenPlotter on an RPi3B
While its great to have all of this information down below for planning purposes, we also wanted to make sure that we could access all of it in the cockpit as well. OpenPlotter sets up a WiFi access point on the RPi so you can connect your phone, tablet, etc. to the RPi and receive all of the data remotely.

One option is through a Virtual Network Connection (VNC). This allows you to control the RPi remotely, or bypass the monitor down below altogether and run a "headless" RPi set up. This also allows both the person on-watch to control the RPi in the cockpit while the off-watch person can control it from down below.

Another option is to have OpenCPN loaded on your tablet/phone, set up OpenPlotter to function as the access point, and transmit the NMEA sentences wirelessly from the Rpi to the tablet. This allows the two systems to run independently, and gives you some redundancy/back up in data.

Receiving wind, depth, speed, GPS, etc. over a wireless access point on a touchscreen tablet in the cockpit from a Raspberry Pi in Phoenix's Nav Station

So far we are very happy with the flexibility and ease-of-use of our new navigational computer. The RPi hardly uses any power, gives us the freedom to choose the instruments (and brands) that we want to incorporate into our system, and compared to proprietary systems, is EXTREMELY cost effective.

Stay tuned for information on the auto-pilot we have since incorporated (with Sean D'Epagnier's help). We're also looking at broadband radar options that we can plug directly into the system as well.